How to Create a Bootable USB Drive – Easy Tools and Steps
- 1. Why Create a Bootable USB Drive?
- 2. Tools Needed to Create a Bootable USB Drive
- 3. Step-by-Step Guide to Creating a Bootable USB Drive
- 4. Troubleshooting Common Issues
- 5. Real-Life Examples of Using Bootable USB Drives
1. Why Create a Bootable USB Drive?
Creating a bootable USB drive is one of the most essential skills for anyone who works with computers. A bootable USB allows you to install or repair operating systems, run diagnostics, and perform system repairs without needing a hard disk. This process is especially helpful when your computer’s operating system fails to load, or if you need to install a fresh copy of the operating system on a new computer or a reformatted drive.

Best Buy
4210 Centerplace Dr, Greeley, CO 80634, USA
Advantages of a Bootable USB
There are several advantages to creating a bootable USB drive:
- Portable: You can carry a bootable USB anywhere, making it easy to perform system repairs or installations on any compatible computer.
- Fast and Efficient: Booting from a USB drive is faster than traditional CD/DVD methods, especially when you use USB 3.0 drives.
- Space-Efficient: A USB drive is compact, portable, and doesn’t take up much space compared to external hard drives or DVDs.
2. Tools Needed to Create a Bootable USB Drive
Before you begin creating a bootable USB drive, you’ll need a few basic tools:
1. A USB Flash Drive
You'll need a USB drive with at least 4GB of free space, though 8GB or more is recommended for newer operating systems. Ensure that the drive is formatted correctly before starting.
2. ISO File of the Operating System
You’ll need an ISO file of the operating system you want to install or repair. These files can be downloaded from the official websites of operating systems like Windows, Linux, or Mac OS.
3. Bootable USB Creation Tool
You’ll need software to create the bootable USB. Popular tools include:
- Rufus: A simple and fast tool to create bootable USB drives, especially for Windows OS installations.
- UNetbootin: A cross-platform tool that allows you to create bootable Linux USB drives.
- Disk Utility (Mac): Built into Mac OS for creating bootable USB drives.
3. Step-by-Step Guide to Creating a Bootable USB Drive
Now, let’s go through a simple step-by-step process for creating a bootable USB drive:
1. Download the Operating System ISO
The first step is to download the ISO file of the operating system you want to install. For instance, if you’re installing Windows, visit the official Microsoft website and download the Windows ISO file. If you want to install Linux, you can download distributions like Ubuntu from their respective websites.
2. Download and Install a Bootable USB Tool
Next, download a tool like Rufus. This software is easy to use, and it’s specifically designed for creating bootable USB drives. Once downloaded, install and open the program.
3. Insert Your USB Drive
Insert the USB flash drive into your computer. Make sure the USB drive is empty, or back up any important data as the process will erase everything on it.
4. Select the ISO File and USB Drive
In the Rufus interface, select your USB drive under the “Device” section. Then, under the “Boot selection” section, choose the ISO file you downloaded. If it’s a Windows ISO, you’ll also need to select the correct partition scheme (usually GPT for UEFI systems and MBR for legacy BIOS systems).
5. Start the Process
Click the “Start” button. The tool will format your USB drive and copy the contents of the ISO file to the USB drive, making it bootable. This may take several minutes depending on the size of the ISO file and the speed of your USB drive.
6. Boot from the USB Drive
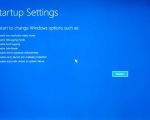
Once the process is complete, you can restart your computer and boot from the USB drive. You may need to change the boot order in your computer’s BIOS/UEFI settings to prioritize the USB device.
4. Troubleshooting Common Issues
Even with straightforward steps, creating a bootable USB drive can sometimes encounter issues. Here are some common problems and their solutions:
1. USB Drive Not Showing Up
If your USB drive doesn’t appear in the boot menu, try using a different port, or check the BIOS/UEFI settings to ensure the USB boot option is enabled. If using a USB 3.0 drive, try a USB 2.0 port as some older systems may not support USB 3.0 booting.
2. Error Messages During Installation
If you receive an error during the installation process, double-check the ISO file for corruption. Re-download it from the official source if needed. Also, ensure that your USB drive has been formatted correctly before creating the bootable drive.
3. Slow Boot Times
Slow boot times can occur if the USB drive is not fully compatible with your system. Using a USB 3.0 drive on a USB 2.0 port can also lead to slower speeds. Ensure you are using the fastest USB port available on your system.
5. Real-Life Examples of Using Bootable USB Drives
Creating a bootable USB drive isn’t just useful for system installations. Many IT professionals, tech enthusiasts, and even regular users use bootable USB drives for various purposes:
1. Repairing a Broken Operating System
When a computer’s operating system crashes and doesn’t boot, having a bootable USB drive with a repair tool or installation OS can be a lifesaver. Users can perform a system restore or reinstall the OS to get their systems running again.
2. Running Diagnostic Tools
Tech enthusiasts often create bootable USB drives with diagnostic tools like MemTest86 or antivirus scanners. These tools can help in troubleshooting hardware issues or removing malware from a system when it’s too infected to boot normally.
3. Testing New Operating Systems
If you’re considering switching to a new operating system, such as Linux, you can run it directly from a bootable USB without needing to install it on your system. This allows you to test the OS and see if it fits your needs before committing to a full installation.