
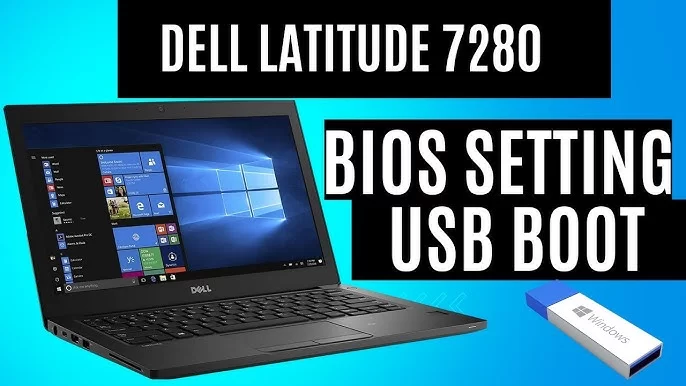
How to Enable Boot from USB on Dell Devices: A Step-by-Step Guide
- 1. Understanding USB Boot on Dell Devices
- 2. Accessing the BIOS Settings on Your Dell Laptop or Desktop
- 3. How to Enable Boot from USB in Dell BIOS
- 4. Setting the USB Boot Option in Dell Boot Menu
- 5. Common Issues and Troubleshooting Tips for Dell USB Boot
- 6. Alternative Solutions for Booting from USB on Dell Devices
1. Understanding USB Boot on Dell Devices
Booting from a USB device is a useful feature that allows users to install operating systems, troubleshoot, or even run live sessions of different software without affecting the internal hard drive. This can be especially helpful if you're installing a fresh copy of Windows, trying to run a diagnostics tool, or even booting Linux distributions. If you're a Dell device owner, enabling boot from USB is a straightforward process—but it requires some changes to the system’s BIOS settings.
What Does USB Boot Mean?
USB boot refers to the process of booting a computer from a USB device instead of the internal hard drive. This is commonly used to install an operating system or run certain utilities that require a bootable drive.
Why Would You Want to Boot from USB?
There are several reasons why you might want to boot from a USB device, including:
- Installing a fresh copy of your operating system
- Running system recovery tools
- Testing out a different operating system without affecting your current setup
- Performing hardware diagnostics
2. Accessing the BIOS Settings on Your Dell Laptop or Desktop
Before you can enable boot from USB on your Dell device, you first need to access the BIOS settings. The BIOS (Basic Input/Output System) is a crucial firmware interface that allows you to configure various hardware settings on your computer, including boot preferences.
How to Enter BIOS on Dell Devices
To access the BIOS on your Dell device, follow these steps:
- Turn off your Dell laptop or desktop.
- Press the power button to turn the device back on.
- Immediately press the F2 key repeatedly until the BIOS setup screen appears.
- If F2 doesn't work, try pressing the DEL key or F12 (depending on the model).
Tips for Accessing BIOS
If you're having trouble accessing the BIOS, make sure to press the key immediately after turning on your computer. It’s a good idea to press the key multiple times to ensure you don’t miss the brief window for entering the BIOS.
3. How to Enable Boot from USB in Dell BIOS
Once you're inside the BIOS settings, the next step is enabling boot from USB. Here’s how you can do that:
Step-by-Step Instructions
- Navigate to the Boot tab using the arrow keys on your keyboard.
- Look for the option labeled Boot Sequence or Boot Options.
- Make sure the USB Storage Device or External Device is listed in the boot priority list.
- If it's not listed, use the +/- keys to move the USB device to the top of the list.
- Save the changes and exit by pressing F10 (usually), then confirm with Enter.
Why This Step is Important
By enabling USB boot in BIOS, you ensure that your computer will prioritize booting from a USB device over the internal hard drive. This allows you to use bootable USB drives for system recovery, installing new software, or running diagnostics.
4. Setting the USB Boot Option in Dell Boot Menu
In addition to enabling USB boot in BIOS, you may also need to select the USB drive from the Dell boot menu when booting up the system. Here’s how:
How to Access the Dell Boot Menu
To access the Dell boot menu, follow these steps:
- Turn on your Dell device and immediately press the F12 key repeatedly.
- This will bring up the boot menu, where you can select the device you wish to boot from.
- Choose the USB device from the list of boot options.
When to Use the Boot Menu
Accessing the boot menu is useful when you want to temporarily boot from a USB device without making permanent changes to the boot sequence in the BIOS. This is particularly handy for running live sessions of operating systems or using recovery tools without altering your system’s default settings.
5. Common Issues and Troubleshooting Tips for Dell USB Boot
While booting from a USB device on Dell computers is typically smooth, you may encounter some issues along the way. Here are some common problems and their solutions:
Issue: USB Device Not Detected
Ensure that your USB device is properly connected to the computer. Try using a different USB port, preferably a USB 2.0 port, as some older systems might have issues with USB 3.0 ports during boot.
Issue: USB Boot Not Available in BIOS
If you can’t find the USB boot option in the BIOS, make sure your USB drive is properly formatted and contains a bootable operating system or tool. You can use software like Rufus to create a bootable USB drive.
Issue: Boot Loop or Failure to Boot from USB
If your system enters a boot loop or fails to boot from the USB, double-check the bootable USB for errors or corruption. Re-create the bootable USB drive if necessary.
6. Alternative Solutions for Booting from USB on Dell Devices
If you’re still having trouble enabling USB boot on your Dell device, here are some alternative solutions:
1. Create a Bootable CD/DVD
If USB boot isn't working, you can try creating a bootable CD or DVD instead. Many BIOS setups allow booting from optical media, so this could be a viable alternative.
2. Use Dell Support Tools
Dell provides several recovery and diagnostic tools that can help you fix boot issues. Visit the Dell Support website for detailed guides on troubleshooting boot-related problems.
Ready to enhance your system’s flexibility and ensure smooth installations? Learn more about advanced booting options and other useful tips by visiting Ninja Stik. Whether you need a bootable USB solution or expert advice on system optimization, Ninja Stik has got you covered. Explore more today!


