
How to Repair Computer Power Supply: Step-by-Step Guide for Fixing Power Issues
- 1. Introduction to Computer Power Supply Issues
- 2. Signs You Need to Repair Your Computer Power Supply
- 3. Steps to Repair Your Computer Power Supply
- 4. Safety Tips When Repairing Power Supply
- 5. Common Power Supply Issues and How to Fix Them
- 6. When to Replace Your Computer Power Supply
- 7. Plan Your Power Supply Repair or Replacement
1. Introduction to Computer Power Supply Issues
If your computer isn’t powering on or is experiencing random shutdowns, the problem may lie with the power supply unit (PSU). A faulty power supply can cause a host of issues, including system instability, overheating, and even potential damage to other components. Understanding how to repair a computer power supply can save you money and time, as well as help you troubleshoot potential issues before opting for a replacement.
2. Signs You Need to Repair Your Computer Power Supply
There are several clear indicators that your computer’s power supply may be malfunctioning. Some of the most common signs include:

Action Computers Inc. -- Denver Location
2890 S Colorado Blvd F, Denver, CO 80222, USA
2.1 Computer Won’t Power On
If you press the power button and your computer doesn’t turn on, it could be a sign that the PSU isn’t delivering power to your motherboard and other components.
Fix It Computer Repair
2638 Geranium Ln, Fort Collins, CO 80525, USA
2.2 Random Shutdowns or Freezes
Power surges or an unstable power supply can cause your computer to shut down unexpectedly or freeze during use.
2.3 Burning Smell or Sparks
A burning smell or visible sparks coming from the PSU could be a dangerous sign of electrical malfunction and should be addressed immediately. In this case, it’s essential to stop using the power supply and assess the damage.
2.4 Overheating
If your PSU feels excessively hot to the touch, it might be overheating due to a failure in cooling or an internal malfunction. This can affect your computer’s performance and cause long-term damage to other components.
3. Steps to Repair Your Computer Power Supply
Repairing a computer power supply can be straightforward if you have the right tools and follow proper procedures. Here’s a step-by-step guide:
3.1 Turn Off and Unplug the Computer
Before starting any repair, make sure the computer is powered off and unplugged from the electrical outlet to avoid electric shocks.
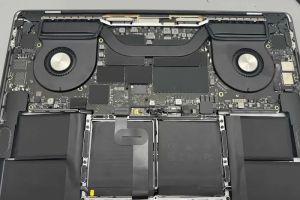
3.2 Open the Computer Case
Use a screwdriver to remove the side panel of your computer case to access the power supply unit. This will allow you to inspect the PSU for visible issues such as damaged cables or burnt components.
3.3 Inspect the Power Supply for Visible Damage
Look for any signs of damage such as burnt marks, leaks, or broken connections. If you spot damaged components, they will need to be replaced or repaired to restore functionality.
3.4 Test the PSU
To test whether your PSU is working, you can use a PSU tester or the paperclip test method. For the paperclip test, short the green wire (PS_ON) to any black wire (COM) on the 24-pin connector and check if the fan in the power supply spins. If the fan doesn’t turn, the PSU is likely faulty and needs repair or replacement.
3.5 Replace the Damaged Components
If you identify any damaged capacitors, resistors, or wires, you can replace them. However, note that working with high-voltage capacitors in the PSU requires proper expertise and safety precautions. If you're unsure, consider seeking professional help.
4. Safety Tips When Repairing Power Supply
Working with electrical components like a power supply can be hazardous. Here are a few safety tips to follow:
4.1 Always Unplug the Computer
Ensure the computer is completely unplugged before starting any work on the power supply to prevent electrical accidents.
4.2 Use Proper Tools
Using the right tools, such as insulated screwdrivers and a multimeter, is important for safe handling and diagnostics. Avoid using metal tools that can cause short circuits.
4.3 Avoid Static Electricity
Static electricity can damage sensitive components, so make sure to ground yourself by using an anti-static wrist strap or by touching a grounded metal object.
5. Common Power Supply Issues and How to Fix Them
Here are some common problems that can arise with power supplies and how to fix them:
5.1 No Power Output
If the power supply isn’t providing any output, it may be due to a blown fuse or faulty internal components. Check and replace the fuse, and if the issue persists, you may need to replace the power supply.
5.2 Overheating
Overheating can occur due to a dusty or blocked PSU fan. Cleaning the fan and ensuring proper ventilation can resolve this issue. If the fan is still not functioning correctly, it may need to be replaced.
6. When to Replace Your Computer Power Supply
While repairing a computer power supply can be an effective solution for some issues, there are situations where replacement is necessary:
6.1 Extensive Internal Damage
If the internal components of the PSU are severely damaged or corroded, replacing the power supply is the best option to avoid further damage to your computer.
6.2 Inconsistent Power Delivery
If the power supply is delivering unstable power, causing random shutdowns or hardware issues, it may be time for a new PSU to ensure stable and reliable performance.
7. Plan Your Power Supply Repair or Replacement
If you're not comfortable with repairing the power supply yourself, it’s always a good idea to consult a professional technician. However, if you feel confident in your skills, make sure to follow all safety precautions and steps outlined above.
Need help with repairing or replacing your computer power supply? Visit Computer Repair for expert guidance and quality replacement options to get your computer back up and running smoothly.


