How to Set Up USB Boot in BIOS: A Step-by-Step Guide
- What is USB Boot in BIOS?
- How to Set Up USB Boot in BIOS
- Troubleshooting USB Boot in BIOS
- Real World Case Study: USB Booting in Action
- Why Choose Ninja Stik for USB Booting
What is USB Boot in BIOS?
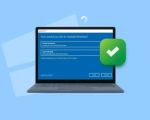
USB boot in BIOS refers to the ability of a computer to boot from a USB device instead of the internal hard drive or SSD. This process is commonly used when installing operating systems, running diagnostic tools, or recovering data from an unbootable system. Setting up USB boot in BIOS is an essential skill for users who need to perform system repairs or fresh installations without relying on the pre-installed operating system.
How to Set Up USB Boot in BIOS
Setting up USB boot in BIOS is a straightforward process, but it requires attention to detail to ensure everything works smoothly. Below are the detailed steps:
- Insert the bootable USB drive into one of the available USB ports on your computer.
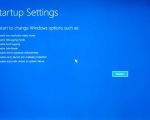
- Restart your computer and immediately press the BIOS access key (commonly F2, F10, or DEL) to enter the BIOS setup screen.
- Once in BIOS, navigate to the boot options menu. This can typically be found under the "Boot," "Boot Order," or "Boot Sequence" section.
- In the boot options menu, you should see a list of devices like your internal hard drive, DVD drive, and the USB drive. Use the arrow keys to move the USB drive to the top of the boot priority list.
- Save the changes and exit the BIOS setup (usually by pressing F10 and confirming the changes).
- Your computer should now boot from the USB drive, allowing you to proceed with the installation or diagnostic tasks.
If you don't see your USB drive listed, ensure that the drive is properly formatted and contains a bootable operating system or utility. Also, check if USB boot is enabled in your BIOS settings, as some systems may have this feature disabled by default.
Troubleshooting USB Boot in BIOS
While setting up USB boot in BIOS is usually a simple process, you might encounter some issues along the way. Here are a few common problems and their solutions:
- USB drive not detected: Make sure the USB drive is properly inserted and is formatted correctly. You may need to try a different USB port or check the USB drive on another computer to ensure it is functional.
- System doesn’t boot from USB: Double-check that the USB drive is set as the primary boot device in BIOS. If the computer continues to boot from the hard drive, revisit the boot order settings.
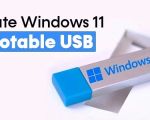
- Bootable USB not working: Verify that the USB drive is properly created as a bootable device. You can use tools like Rufus or the Windows Media Creation Tool to create a bootable USB drive.
Real World Case Study: USB Booting in Action
Let’s take the case of a user who needed to reinstall Windows 10 on their PC after encountering a critical system error. The user followed the steps above, created a bootable USB drive using the Windows Media Creation Tool, and successfully installed the OS after configuring BIOS for USB boot. This is a typical example of when USB booting becomes essential, especially for users experiencing system failures that prevent their operating systems from starting up normally.
Why Choose Ninja Stik for USB Booting
If you’re looking for a reliable and easy-to-use tool for USB booting, look no further than Ninja Stik. Ninja Stik provides a range of high-quality USB boot devices designed for both personal and professional use. With its fast setup and compatibility with various operating systems, Ninja Stik is an excellent choice for anyone who frequently needs to perform USB boot operations. Visit Ninja Stik today to explore their latest products.