
How to Fix "Automatic Repair Couldn't Repair My Computer" Error
Published on May 02, 2025Computer Repair Near Me


Recommended
Best Budget Laptops for Everyday Use – 2025 Buyer’s Guide
Discover the best budget laptops for everyday use in 2025. Explore features, user cases, and top picks tailored for students, remote workers, and families on a budget.
Jul 31, 2025
How to Create a Bootable USB Drive – Easy Tools and Steps
Learn how to create a bootable USB drive with easy tools and steps. Follow our detailed guide for installing operating systems or troubleshooting systems using a bootable USB.
Jul 30, 2025
Best Tools for Diagnosing PC Hardware Problems: Expert Guide and Case Studies
Discover the best tools for diagnosing PC hardware problems with detailed software reviews, real case studies, and expert repair tips. Learn how Computer Repair can help resolve system issues quickly and effectively.
Jul 29, 2025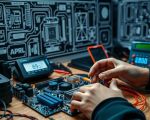
Laptop Overheating? Here’s How to Cool It Down Fast
Is your laptop overheating? Learn how to cool it down fast with practical fixes and expert advice. Discover when it's time to seek help from Computer Repair professionals.
Jul 28, 2025
How to Reinstall Windows Without Losing Your Files – Step-by-Step Guide
Learn how to reinstall Windows without losing your files using safe methods. Step-by-step guide for Reset PC and Media Creation Tool. Backup tips, expert advice, and help from Computer Repair.
Jul 27, 2025
How to Boot Into Safe Mode on Windows 10/11: Step-by-Step Guide
Learn how to boot into Safe Mode on Windows 10 and 11 using various methods. This guide covers step-by-step instructions and real-life troubleshooting advice.
Jul 26, 2025
Related Categories
Recommended

officemax fort collins
2211 S College Ave #500, Fort Collins, CO 80525, USA

walmart business center hours
4625 S Mason St, Fort Collins, CO 80525, USA

walmart quebec denver co
1250 E Magnolia St, Fort Collins, CO 80524, USA
walmart on quebec in denver
1250 E Magnolia St, Fort Collins, CO 80524, USA

walmart business center
1250 E Magnolia St, Fort Collins, CO 80524, USA

office depot in longmont
2514 Main St, Longmont, CO 80504, USA
Popular
How to Boot Dell Optiplex from USB Drive | Step-by-Step Guide
Feb 07, 2025
How to Create a Bootable USB Drive for BIOS Updates: A Step-by-Step Guide
Feb 04, 2025How to Boot from USB on Dell XPS: A Complete Step-by-Step Guide
Jan 22, 2025
Boot Menu Key for Acer Laptop: How to Access and Use It
Jan 24, 2025
Dell BIOS USB Boot: A Step-by-Step Guide to Booting from a USB Drive
Jan 26, 2025How to Access Dell Laptop Boot Menu Using the Right Boot Menu Button
Jan 08, 2025
HP Laptop Boot Key: Essential Guide to Accessing BIOS and Boot Options
Jan 10, 2025
Acer BIOS Boot from USB Configuration: A Complete Setup Guide
Jan 19, 2025Dell Computer Boot Menu Navigation – A Complete Guide to Boot Settings and Options
Feb 05, 2025
DIY Electronics Repair Guide for Beginners – Simple Tips and Techniques to Fix Your Gadgets
Feb 18, 2025