Understanding the Automatic Repair Issue on Windows Computers
If you've ever turned on your computer only to be greeted with the dreaded "Automatic Repair" screen, you're not alone. This issue can happen when Windows detects a problem with the operating system that prevents it from booting properly. The computer might enter an automatic repair loop, continuously attempting to fix itself without success. While this situation can be frustrating, it’s not insurmountable. In this article, I'll share some of the most common causes of this issue and walk you through several practical steps to fix automatic repair problems on your computer.

Action Computers Inc. -- Denver Location
2890 S Colorado Blvd F, Denver, CO 80222, USA
1. Common Causes of the Automatic Repair Loop
Understanding why your computer is stuck in the "Automatic Repair" loop is the first step toward solving the problem. There are several potential causes for this, including:
- Corrupted system files
- Bad updates or faulty drivers
- Improper shutdowns or system crashes
- Damaged hard drive sectors
When the system detects these issues, it attempts to fix them automatically using a built-in recovery tool. However, if the tool cannot resolve the problem, your computer may continue to loop, leaving you stuck at the "Preparing Automatic Repair" screen. Fortunately, there are solutions you can try.
Fix It Computer Repair
2638 Geranium Ln, Fort Collins, CO 80525, USA
2. How to Perform a Hard Reboot and Enter Safe Mode
One of the first steps to fixing automatic repair issues is performing a hard reboot of your system. This simple action can sometimes help resolve minor glitches that prevent your computer from booting properly. To do this:
- Turn off your computer completely.
- Disconnect all external devices like USB drives, printers, or external hard drives.
- Press and hold the power button for about 30 seconds to ensure the system is completely powered down.
- Turn the computer back on and immediately press the F8 key or Shift + F8 (depending on your version of Windows) to access the Advanced Boot Options menu.
Once in the Advanced Boot Options menu, select "Safe Mode" to boot your computer with minimal drivers. This allows you to perform further troubleshooting steps without the interference of potentially corrupted files or drivers.
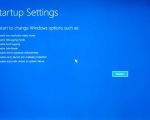
3. Use the Startup Repair Tool
Another built-in tool that can help you fix automatic repair problems is the "Startup Repair" utility. This tool is designed to automatically diagnose and repair common startup issues that can prevent your computer from booting properly. To use the Startup Repair tool:
- Restart your computer and press F8 (or Shift + F8) to access the Advanced Boot Options menu.
- Select "Troubleshoot" and then "Advanced Options."
- Click "Startup Repair" from the list of available options.
Windows will then attempt to diagnose and fix any issues preventing the operating system from loading. If the tool is successful, your computer should boot up normally.
4. Running System File Checker (SFC) and DISM Tools
Sometimes the automatic repair process fails because of corrupted system files. In these cases, running the System File Checker (SFC) tool can help fix the corruption. To do this, you need to access the Command Prompt from the "Advanced Options" menu. Here's how:
- In the Advanced Options menu, select "Command Prompt."
- In the Command Prompt window, type
sfc /scannowand press Enter. - Wait for the process to complete. This may take several minutes.
After the scan is complete, restart your computer and check if the issue is resolved. If SFC doesn’t fix the problem, you can try running the Deployment Imaging Service and Management (DISM) tool:
- In the Command Prompt, type
DISM /Online /Cleanup-Image /RestoreHealthand press Enter. - Wait for the tool to complete its repair process, and then restart your system.
The DISM tool can repair system image corruption that may prevent the system from booting correctly.
5. Repairing Boot Configuration Data (BCD)
If your computer is still stuck in the automatic repair loop, the Boot Configuration Data (BCD) might be corrupted. The BCD is essential for the system to load correctly. Here’s how to rebuild the BCD:
- Boot into the Advanced Boot Options menu.
- Select "Command Prompt" from the "Advanced Options" menu.
- In the Command Prompt, type
bootrec /rebuildbcdand press Enter. - If asked, select "Yes" to add the installation to the boot list.
Rebuilding the BCD should help fix the automatic repair problem. If this doesn't resolve the issue, you might need to perform a system restore or reinstall Windows.
6. Consider a System Restore or Factory Reset
If all else fails, you can attempt a system restore or a factory reset. A system restore will return your computer to a previous state when it was working correctly, while a factory reset will erase all your data and reinstall Windows from scratch. To perform a system restore:
- Access the Advanced Boot Options menu and select "Troubleshoot."
- Click "Advanced Options" and then choose "System Restore."
- Follow the on-screen instructions to restore your system to a previous restore point.
If this doesn’t work, the last resort would be a factory reset, which can be done from the "Troubleshoot" menu. Be sure to back up your important files before performing a reset, as it will erase all your data.
Fixing the "Automatic Repair" loop can be daunting, but with the right steps, it’s entirely possible. If you're still struggling with automatic repair on your computer, consider seeking professional help. At Computer Repair, we provide expert services to resolve issues like this and get your computer back to normal. Want to learn more? Visit our site for helpful tips and services that will keep your system running smoothly!