How to Repair Computer Power Supply: Step-by-Step Guide to Fixing Common Issues
When your computer experiences power issues, it can be a real headache, especially when you rely on it for work or leisure. One of the most common reasons for power failure is a malfunctioning power supply unit (PSU). But can you fix it yourself? Absolutely! With the right knowledge and a bit of patience, you can diagnose and repair many power supply issues on your own. In this article, we’ll walk you through the steps of repairing a computer power supply, the common problems you may encounter, and when it's time to call a professional.

Action Computers Inc. -- Denver Location
2890 S Colorado Blvd F, Denver, CO 80222, USA
1. Understanding the Role of the Power Supply
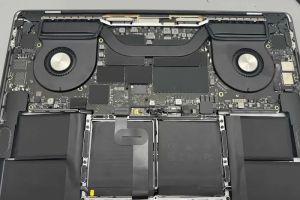
The power supply is the heart of any desktop computer system, responsible for converting the electrical energy from the wall outlet into usable power for your computer's components. It delivers stable voltages to the motherboard, processor, storage devices, and other essential parts. If your computer is not turning on or is experiencing random shutdowns, the PSU could be the culprit. Understanding how the PSU works is the first step toward diagnosing the problem.
Fix It Computer Repair
2638 Geranium Ln, Fort Collins, CO 80525, USA
2. Diagnosing Power Supply Failure
Before diving into repairs, you need to confirm that the power supply is, in fact, the problem. Some common signs of a faulty PSU include:
- Computer fails to turn on
- System powers on but shuts down unexpectedly
- Unusual noises or smells coming from the PSU
- Unstable voltage levels affecting computer performance
To diagnose these issues, first check if the power cord is securely plugged in. If the cord is fine and the power button doesn’t respond, the PSU might be faulty. If you suspect a power supply issue but are unsure, you can use a power supply tester or multimeter to test the PSU’s output voltages.
3. Tools Needed for Repairing a Power Supply
When it comes to repairing your power supply, it’s essential to have the right tools. Some of the basic tools you'll need include:
- Multimeter (for testing voltage)
- Screwdriver set (to open the PSU and the computer case)
- Power supply tester (optional, for more precise diagnostics)
- Safety gloves (to prevent electric shocks)
With these tools in hand, you can begin troubleshooting your power supply. Always ensure your computer is unplugged and completely powered down before you start working on it.
4. Step-by-Step Process to Repair Your Power Supply
Once you've diagnosed the issue, it's time to start repairing your PSU. Follow these steps carefully:
- Unplug your computer: Always disconnect your computer from the power source before you begin any repair work.
- Open the case: Use a screwdriver to open your computer’s case and access the PSU. Remove any cables that may be obstructing your work.
- Inspect for visible damage: Look for burnt areas, exposed wires, or broken connectors. If you notice any, these may need replacing.
- Check capacitors: Faulty capacitors are a common cause of PSU failure. Use a multimeter to check if any capacitors are malfunctioning.
- Replace the PSU or faulty parts: If the damage is extensive or the PSU is outdated, it may be more cost-effective to replace the unit rather than repair it.
- Reassemble and test: Once repairs are complete, reassemble your computer and power it on. Check to ensure the system is functioning properly.
5. When to Replace the Power Supply
In some cases, attempting to repair your PSU may not be worth the effort, especially if the unit is too damaged or outdated. If you find yourself needing to replace major components like capacitors or the entire PSU unit, it might be more cost-effective and safer to simply purchase a new PSU. When shopping for a replacement, make sure to choose a reputable brand and check the power rating to match your computer's needs. Many modern PSUs offer greater efficiency and reliability.
6. Preventing Future Power Supply Failures
To extend the lifespan of your power supply and prevent future issues, consider the following tips:
- Ensure proper ventilation in your computer case to prevent overheating.
- Regularly clean dust from your PSU and internal components.
- Avoid overloading your PSU by adding too many high-power components.
- Consider using a surge protector or UPS (Uninterruptible Power Supply) to protect against power surges and outages.
Conclusion: Is Repairing Your Power Supply Worth It?
Repairing a computer power supply can be a rewarding DIY project for those with the right tools and experience. However, if the damage is extensive or you’re unsure about handling the repair yourself, replacing the PSU with a new one might be the best option. Remember, safety is always the priority—if you're not comfortable with electrical components, don’t hesitate to consult a professional. For those who enjoy the hands-on approach, this guide provides everything you need to tackle power supply issues head-on and get your computer back up and running.
If you're looking for expert computer repair services or want to learn more about fixing your PC, visit Computer Repair for more detailed advice and support.